April 20, 2012 [draft]
Digitization of Standard Microscope Slides
Courtesy of InvertNet and Illinois Natural History Survey
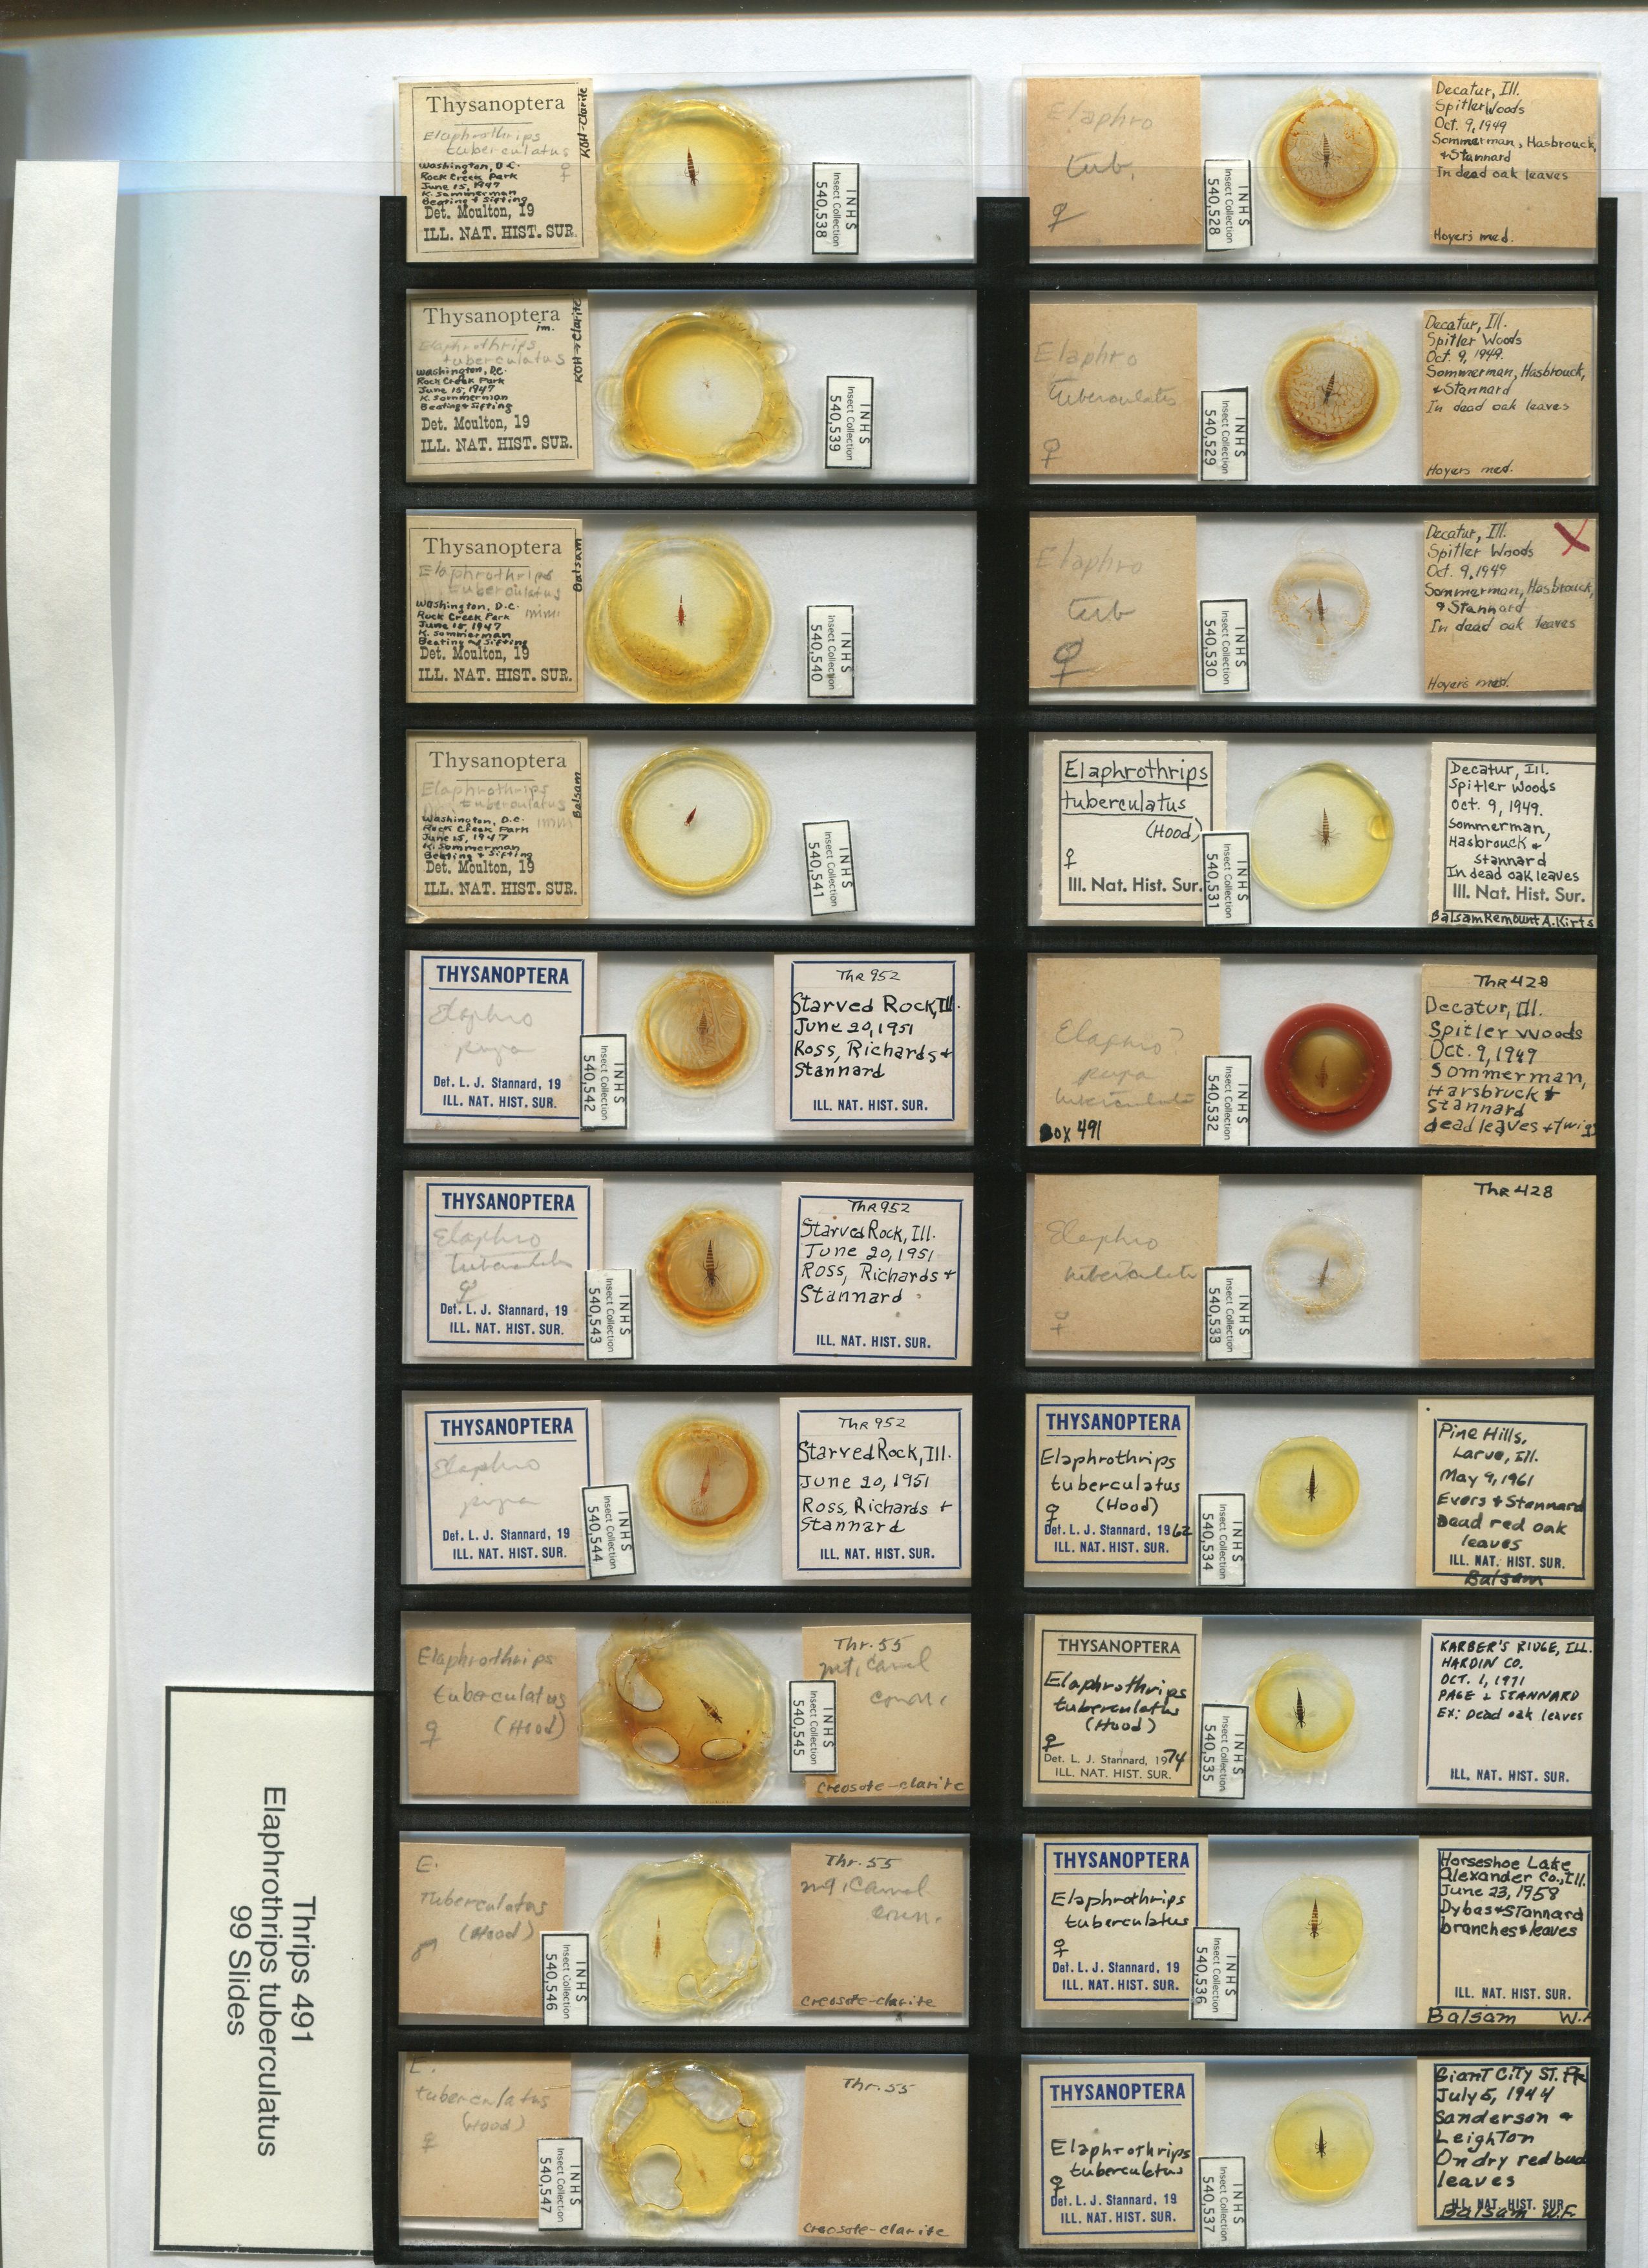
Introduction. The following describes the equipment and procedures for digitizing 20 standard microscope slides at a time using a standard photo-quality flatbed scanner. The resulting scans are of sufficient quality that the slide images may be used subsequently for label data capture and collection profiling. In most cases the images of the specimens themselves will not be of much use other than to determine the general condition of the specimen. The goals of this method are to allow rapid capture of slide images and metadata for incorporation into a collection database. Because the slide image is then persistently associated with its record in the database, it is possible at all times to “ground truth” the text data captured from the labels by directly comparing the text to the image of the label.
Equipment and supplies:
1. Epson Perfection V300 Photo flatbed scanner or comparable model. We have achieved good results with the Epson but have not tested others. If you have a different model you may be able to achieve similar or better results. The size of the scanner bed and the options available for image quality and file formats are comparable in most consumer-grade flatbed scanners currently on the market.
2. Unique ID labels printed on archival quality paper for your institution. These will be attached to slides prior to scanning. If original slide labels need to be replaced, the UIDs may incorporated into the new label text. For our replacement slide labels we use self-adhesive “tough tags” , available from USA Scientific, catalog # 9164-1000.
3. 100% silicone clear adhesive sealant. We use DAP brand, which comes in 2.8 ounce tubes.
4. Clear Plexiglas slide tray for holding 20 slides. Ours are custom made and are sized to fit exactly on the scanner bed so that all resulting scans have slides positioned exactly alike; specifications for slide tray are provided below. Alternatively you may use a clear sheet of acetate plastic (like those used for overhead projectors) with a grid printed on it that indicates 20 rectangular spaces sized appropriately for placement of slides; a template is shown. This sheet may then be placed on the scanner bed prior to placing the slides on the scanner bed.
Scanning procedure:
1. Print and cut UID labels (barcodes or numbers, whichever your institution prefers) and attach them to slides using a small amount of silicone adhesive; wait for the adhesive to dry.
2. Place label from outside of slide box (or facsimile), face down, at top left corner of slide tray or scan template, to the left of the first column of slide spaces.
3. Place first 20 slides from box face down on slide tray in sequential order as shown by the small numbers in the figure below.
4. Place tray on scanner bed; cover with scanner lid; if using acetate template, cover with 11 x 17” piece of white paper and leave lid open to avoid putting pressure on slides.
5. Open Epson Scan application on computer; select “Professional Mode” at the top; select “Reflective” for Document type; select “24-bit” for image type; select “Photo” for Auto Exposure type; make sure Target Size is set to “Original”; and select “600 dpi” for Resolution. Also make sure that Document size is set to 8.5 x 11.7 (the default) and check the “unsharp mask” box near the bottom.
6. Save scan file as tif using a file naming convention that includes the slide box number, and the taxon name; e.g., “S400_Haplothrips_mali_001.tif” refers to INHS slide box #400, which contains first 20 slides for the species Haplothrips mali. Subsequent sets of 20 slides from the same box (of 100 slides) would have the same file name except with 002, 003, 004, and 005 appended to the end. The Epson Scan software allows you to set a prefix for your file names (up to 24 characters) prior to scanning and automatically increments the number on the end of the file name. You may use whatever file naming system you prefer as long as it allows you to keep track of which slides/boxes are represented by each image file.
7. Repeat above procedure for subsequent sets of 20 slides from same box.
8. When you finish one box, change the file name prefix in Epson Scan to include the new box number and taxon, and set the image number back to 001 before continuing. Keep all image files together in the same folder on your computer and make sure to back up your hard drive regularly. To provide additional backup, you should also upload the images to InvertNet.org as soon as possible using the following procedure.
Uploading image files to InvertNet
Note: This procedure is presently only available through the InvertNet testbed: https://invertnet2.dyndns.org
For a login and password, please contact Omar Sobh at ocazoodle@gmail.com
1. Open your web browser and go to invertnet.org
2. Log in using your user name and password
3. Click on “Ingest Collection” on top menu bar
4. Log in to the Medici portal using your Medici login.
5. Add metadata for the file being uploaded (e.g., slide box number, taxon) to the appropriate fields as indicated on the web form
6. Select the object type (vial, slide or drawer)
7. If desired, fill in collection profile information using the pull down menus
8. To upload the image, click the “browse” button, locate the file, and click “continue” at the bottom of the form.
Specifications and assembly instructions for Plexiglas slide tray
Materials:
1. Sheet of 0.25 inch-thick clear Plexiglas
2. 2mm diameter wire, cut into 5/16” lengths
3. 100% silicone adhesive
Assembly:
1. Cut 11 ½” x 8 3/8” rectangle of Plexiglas
2. Cut four strips of Plexiglas 3/8” wide as follows: two 8 3/4” and two 11 ½”
3. Drill shallow 2 mm diameter holes (1/8” deep) into rectangular sheet from step 1 as shown on diagram.
4. Attach 11 ½” strip to long side of rectangular sheet using adhesive, then attach two shorter strips to adjacent ends to form a rim around three edges of the sheet.
5. Attach the other 11 ½” strip 6 1/8” from edge lacking a border strip.
6. Insert cut pieces of wire into holes, securing them with adhesive.
Note: for a cheaper, quicker option, simply print the template shown with this document onto a 8 ½ x 11” piece of clear acetate film—the kind used to create transparencies for overhead projectors. This may be placed on the scanner bed to prior to positioning 20 slides in the grid as would be done using the Plexiglas tray. When printing, make sure to select “None” under “Scaling” in the Print menu so that the grid will print at the correct size.

Photo: 20 slides scanned using acetate film template. Spacing of slides is the same as for Plexiglas tray. Note that template is smaller than scanner bed and must be pushed to upper left corner of scanner bed (lower left in above image) to provide consistent results.


