Getting Started
Jump to navigation
Jump to search
Get the Package and Run on Linux
- Download the zip file for Linux from our binary release page.
- Unzip the downloaded file
- Go into the directory "idigbio-ingestion-tool-master" and double click the file "main.py".
- Select "Run in Terminal".
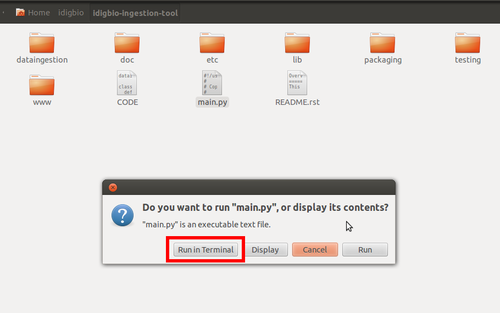
- The idigbio application user interface will be brought up automatically in your default web browser. If not, please input the URL 127.0.0.1:32601 in your web browser.

Get the Package and Run on Mac OS X
- Download the dmg file for Mac OS from here - select the latest version for your operating system (Mac OSX)
- Open the dmg package
- Drag and drop the "iDigBio Image Ingestion Tool" icon to a folder where you would like to install it
- Double-click on the icon to run the appliance - if you are not able to run it because of an "Unidentified developer troubleshooting" error, follow these instructions
- The idigbio application user interface will be brought up automatically in your default web browser. If not, please input the URL 127.0.0.1:32601 in your web browser.

Get the Package and Run on Windows
- Download the zip file for Windows from here - select the latest version for your operating system (Windows Vista an up)
- Unzip the downloaded file
- Go into the directory you extracted, and double click the file "iDigbio Image Ingestion Tool.exe".
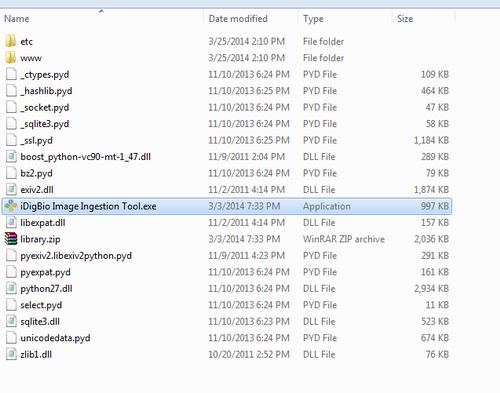
- The idigbio application user interface will be brought up automatically in your default web browser. If not, please input the URL 127.0.0.1:32601 in your web browser.

Signing In with Your Account Information
- If this is the first time you are using this application, you need to log in with your iDigBio Account UUID and the API Key. You may request the login combination from iDigBio. You can get a account UUID / API key pair by [following this].
- Fill in your login information in the dialog box after you launch the application, as shown below.

- Once you have successfully signed in, your Account UUID and API Key are saved on your computer and you don't need to sign in again next time you open the appliance.
Image Ingestion Tool at a Glance

- Upload via CSV : Upload media files using a CSV file.
- Upload History : View the history of previous uploads from user's computer.
- Generate CSV : Create a CSV file for the images in a folder.
Image Ingestion Procedures
- At first, you want to make a CSV (Comma Separated Value) file. The CSV should contain the information describing the media files that you are about to upload. We recommend you use the "Generate CSV" tab if you are not familiar with a CSV file.
- After the CSV file is ready either by manually creating one or by the generation step, you can upload media files through "Upload via CSV" tab.
- You can always check the previous uploads through the "Upload History" tab.
- Hereafter, we present an example of uploading a collection of image files from the folder, presented in a step by step manner. It consists of two steps. The first is generating a CSV file and then the second is uploading image files with the CSV descriptive file.
Generate a CSV File
- Begin by clicking the "Generate CSV" tab.
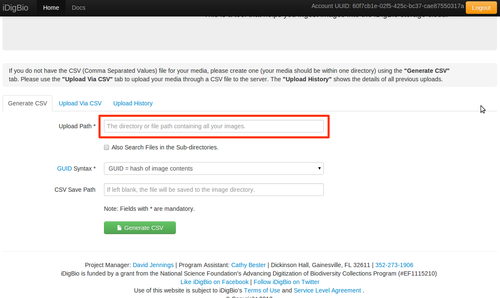
- When you type in the path of the folder, it would be easier to copy the path from the browser address bar.
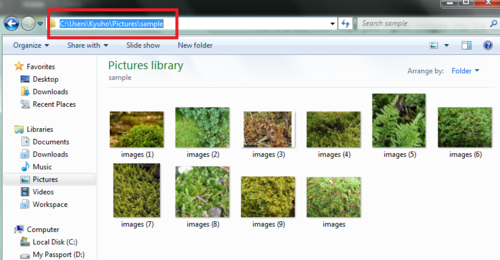
- Then specify the GUID syntax. If you are not familiar about the differences among the selections in the drop down menu, you can simply use "hash of the record information". Finally, type in the destination path to the CSV file.
- A complete list of all fields in the CSV file can be found here: Input CSV Format.
Upload Images using a CSV File
- Now you upload a folder of images through a CSV file. At first, specify the image license from the drop-down menu, then type in the path to CSV file that you created. Finally, click the upload button.

- On successful upload, you should see the result similar to the one shown below.

Resuming a Failed Upload Batch
- If not all the images in the batch are successfully uploaded, you can see which media failed to upload.

- To continue with the batch, just click the yellow "Retry failed upload" button. Note that the previously uploaded images are "skipped" (as shown above the progress bar).
Show the History of Previous Uploads
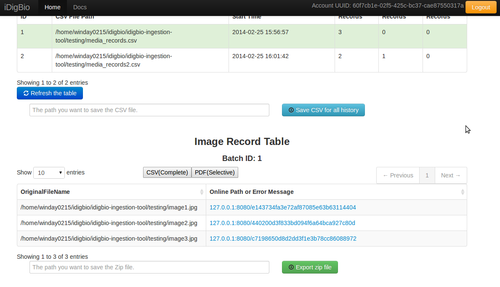
- When you click on the "Upload History" tab, you will see all the previous upload batches shown like this. Use the "Save CSV for all history" button to save all the history to the specified directory.
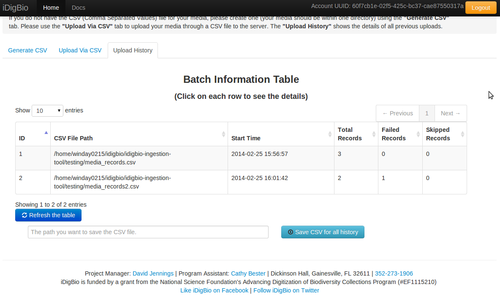
- See the details of each uploaded batch by clicking on each of entries.
